In the following example we are creating a Popdock API endpoint so that we can get the data from a list over to Power BI.
How to Add an API Endpoint:
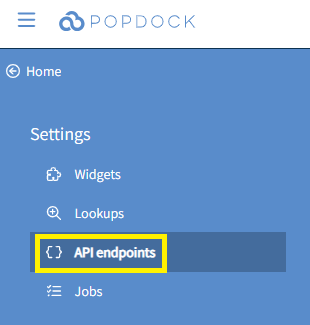
1. Click the triple bar menu in the upper left corner of the Popdock homepage and select Developer from the drop down menu.

2. Select API endpoints from the left Settings menu.
3. Click the link to add an endpoint.

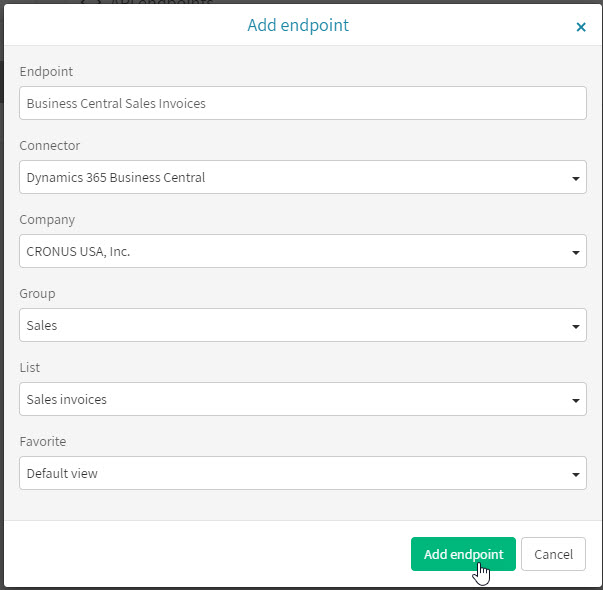
4. Complete the Add endpoint form with the name for the endpoint, connector you want to use, company if needed, and the list you want to use. In this example, we are using the Business Central connector which requires a company and just choosing a default list. If you have a favorite saved you can also select your favorite. Once you have it completed, click the “Add endpoint” button at the bottom.
Important Tip
The data created for the API endpoint is based on the default fields for a list or the fields you have saved in your Favorite so only those fields will be seen by Power BI.
5. Your API endpoint is now created. Click the button with the clipboard icon to copy the URL to your clipboard and now we can go to Power BI to configure the data connection to the endpoint.

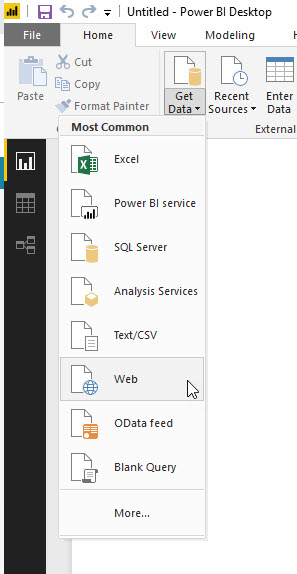
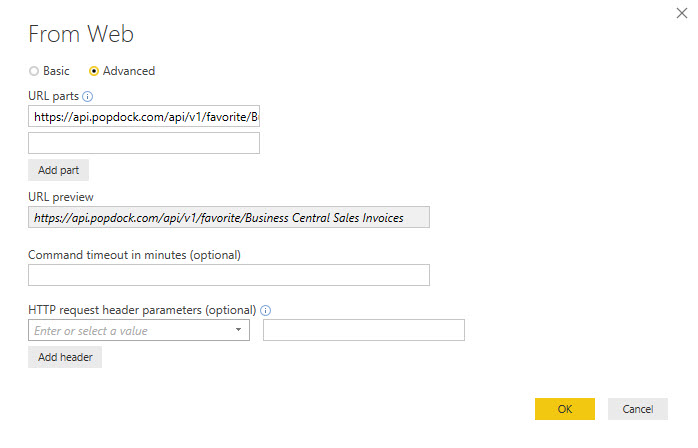
6. Choose Get Data option in Power BI and select the Web option.
7. When the From Web window appears with the option to select Basic or Advanced, check the bullet for Advanced because we will need to add more information for the connection to Popdock to work. Then select the first box under URL parts and paste the API endpoint that you have copied to your clipboard. At the end of the URL that you pasted make sure it has “?format=csv” or you can manually add it to the end of the URL. For example, “https://api.popdock.com/api/v1/favorite/Business Central Sales Invoices?format=csv”.
8. Next go to your Profile dropdown menu and select Edit Profile, select Tokens from the left navigation.
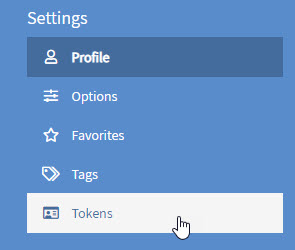
9. Here you will see tokens that have been created for your Popdock account, click the “+Add token” button to generate a new token to be used with Power BI. Enter a description and the user you want to assign the token to. Then click the “Add token” button.
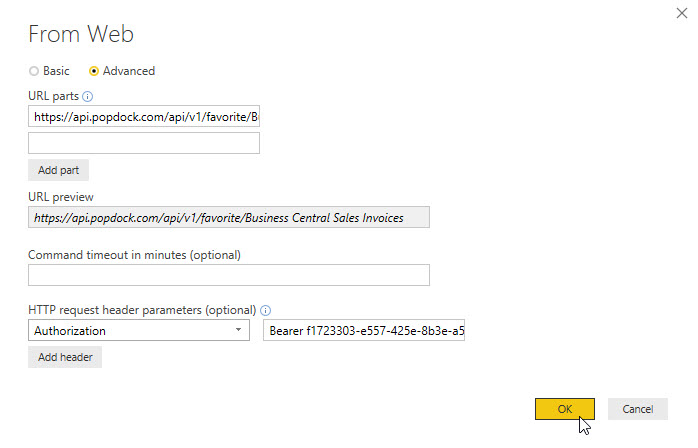
10. Now find the token you created, highlight, and copy it to your clipboard.

11. Return to Power BI and find the section of the form for “HTTP request header parameters (optional)”. Select Authorization from the drop down menu for the first box, then in the 2nd textbox type “Bearer ” with a space after then paste the token so that it looks like this example “Bearer f1723303-e557-425e-8b3e-a5e2c16ec270”. Once you have this complete, then click OK.
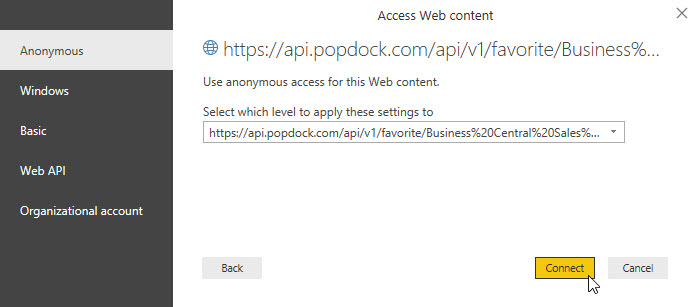
12. When the Access Web content window appears, leave the selection on Anonymous, but make sure the “Select which level to apply these settings to” dropdown has the full URL selected. Then click Connect.
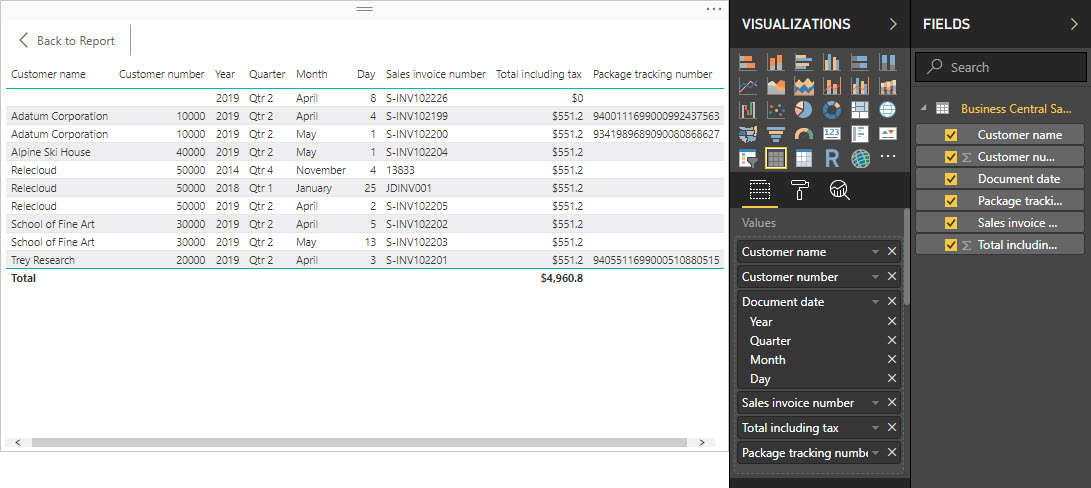
13. The connection should be successful and the data from the list should show as a table on the load window.
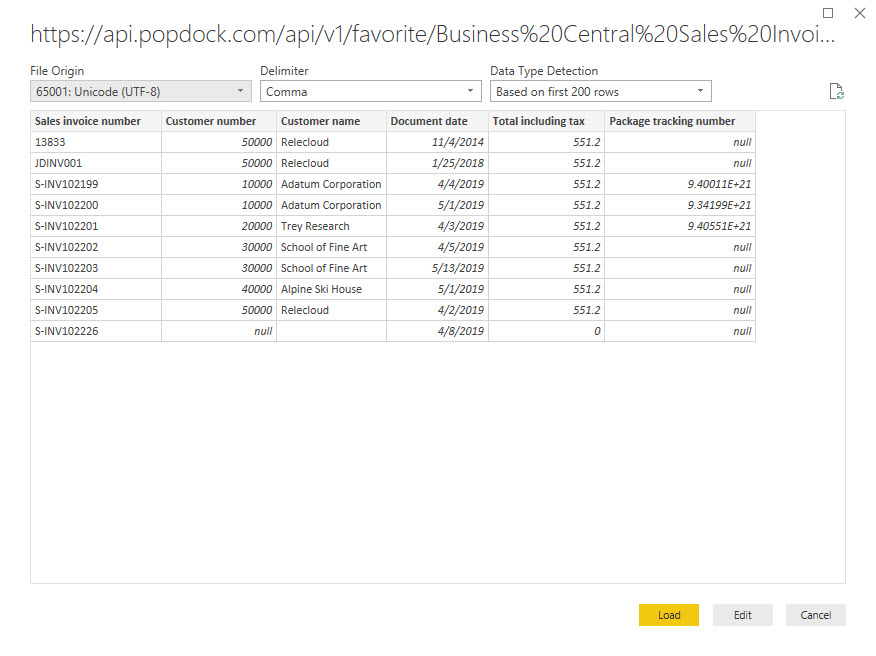
14. If everything looks correct, click the “Load” button and your data is now available to show in Power BI.