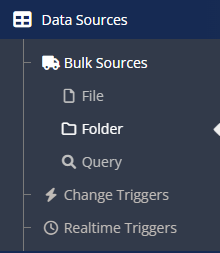
- From the left side options column navigate to Data Sources > Bulk Sources > Folder.
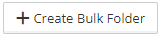
- On the File Data Sources window click on the Create Bulk Folder button.
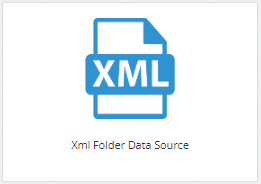
- Select the XML Folder Data Source Icon.
- This will open the XML Folder Data Source Setup window.
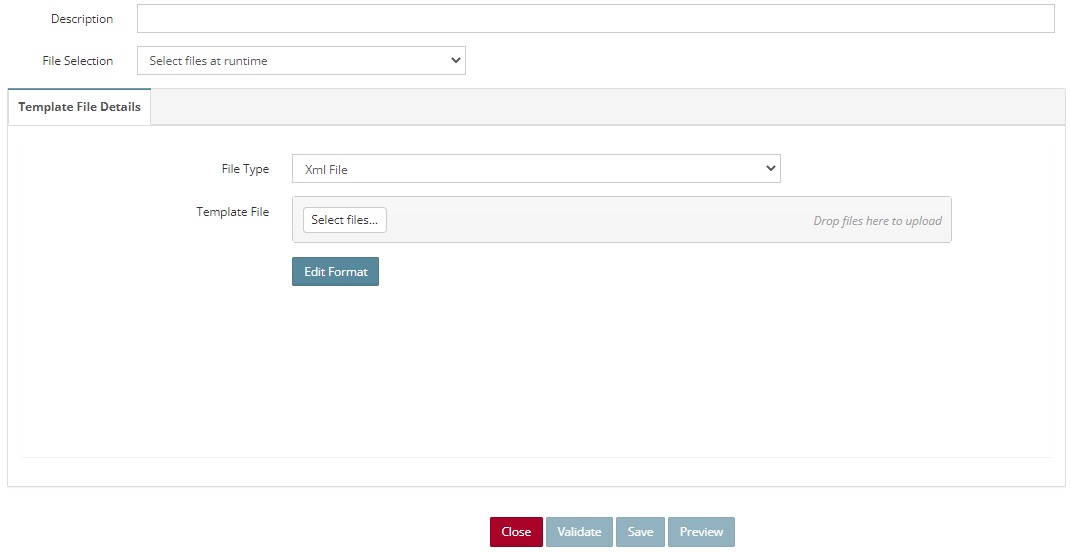
- Enter a Description.
- File Selection – Select where the files will be loaded from, options include
- Select files at runtime
- Load from FTP connection
- Load from OneDrive connection
- Load from Outlook connection
- Load from SharePoint connection
Note: Each option has different settings, and those will be explained below.
- File Type – Select XML File.
- Template File – Click on Select files button to select the template file that will be uploaded. (Note: the uploaded file will be used as a template to define the columns and no data from it will be processed).
- Edit Format – Clicking on this button will open a popup window that allows the user to edit the format of the XML file.
Select Files at Runtime
- There are no further steps you need to take when using “Select files at runtime”. When you run an integration using this source, you will be asked to select the source file to run from your local machine. The source file columns must match the columns from the template file, otherwise it will not run the source file.
Load from FTP Connection
- Go to the FTP Details tab.
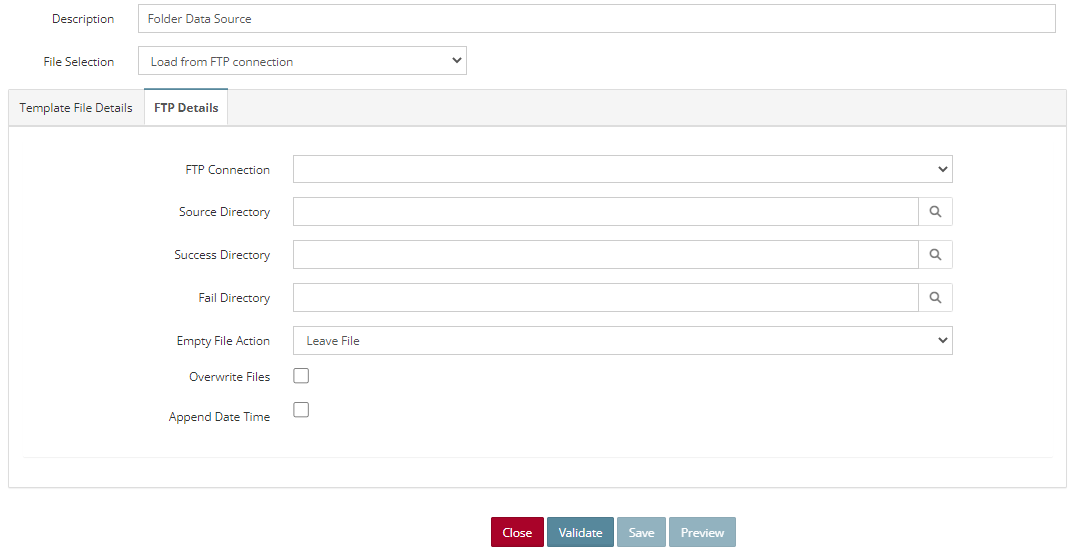
- FTP Connection – The drop-down list will contain FTP Connection(s) created under the Connections option.
- Source Directory – Location where the files used for the integration are stored.
- Success Directory – Files that are processed successfully are moved to this location.
- Fail Directory – Files that fail during processing are moved to this location.
- Empty File Action – Drop-down list which indicates the action that should be taken on empty files.
- Leave File – Leaves empty files in the Source Directory.
- Move File to Failure – Moves empty files to the Fail Directory.
- Move File to Success – Moves empty files to the Success Directory.
- Overwrite Files – Mark this checkbox if the files in the Fail and Success Directories should be overwritten.
- Append Date Time – Mark this checkbox to append the Date and Time to the files moved to the Fail and Success Directories.
- Click Validate to verify the connection to the spreadsheet. (Note: validation must be successful for the Save and Preview buttons to become active).
- Click Preview to display a pop-up window with a sample of the data from the spreadsheet.
- Save the Data Source.
Load from OneDrive connection
- Go to the OneDrive Details tab.

- Graph Connection – The drop-down list will contain Graph Connection(s) created under the Connections option.
- Source Directory – Location where the files used for the integration are stored.
- Success Directory – Files that are processed successfully are moved to this location.
- Fail Directory – Files that fail during processing are moved to this location.
- Empty File Action – Drop-down list which indicates the action that should be taken on empty files.
- Leave File – Leaves empty files in the Source Directory.
- Move File to Failure – Moves empty files to the Fail Directory.
- Move File to Success – Moves empty files to the Success Directory.
- Overwrite Files – Mark this checkbox if the files in the Fail and Success Directories should be overwritten.
- Append Date Time – Mark this checkbox to append the Date and Time to the files moved to the Fail and Success Directories.
- Click Validate to verify the connection to the spreadsheet. (Note: validation must be successful for the Save and Preview buttons to become active).
- Click Preview to display a pop-up window with a sample of the data from the spreadsheet.
- Save the Data Source.
Load from Outlook connection
- Go to the Outlook Details tab.

- Outlook Connection – The drop-down list will contain Graph Connection(s) created under the Connections option.
- Source Directory – Location where the files used for the integration are stored.
Load from SharePoint Connection
- Go to the SharePoint Details tab.
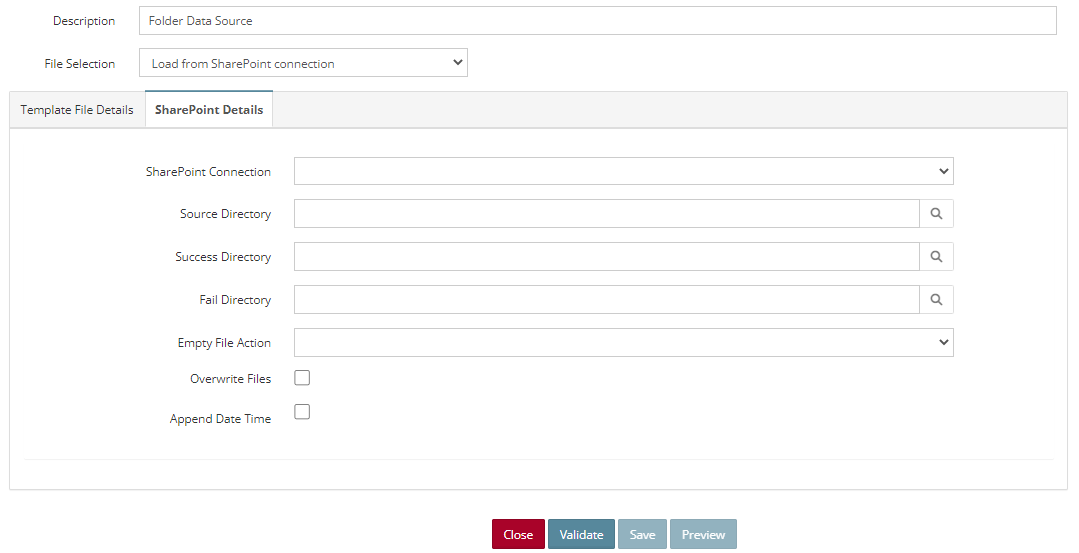
- SharePoint Connection – The drop-down list will contain Graph Connection(s) created under the Connections option.
- Source Directory – Location where the files used for the integration are stored.
- Success Directory – Files that are processed successfully are moved to this location.
- Fail Directory – Files that fail during processing are moved to this location.
- Empty File Action – Drop-down list which indicates the action that should be taken on empty files.
- Leave File – Leaves empty files in the Source Directory.
- Move File to Failure – Moves empty files to the Fail Directory.
- Move File to Success – Moves empty files to the Success Directory.
- Overwrite Files – Mark this checkbox if the files in the Fail and Success Directories should be overwritten.
- Append Date Time – Mark this checkbox to append the Date and Time to the files moved to the Fail and Success Directories.
- Click Validate to verify the connection to the spreadsheet. (Note: validation must be successful for the Save and Preview buttons to become active).
- Click Preview to display a pop-up window with a sample of the data from the spreadsheet.
- Save the Data Source.