With the use of a Popdock widget you can integrate a Popdock list into your Business Central FactBox and filter down to return context sensitive data. Below are 3 example methods for embedding in FactBoxes.
1. FactBox on a List Page
2. FactBox on a Card Page
3. FactBox on a Subform
Important Tip
A Popdock widget will need to be created prior to following these steps because you will need the widget URL. Click Here to learn how to create a Popdock widget.
Final code of this example can be downloaded here.
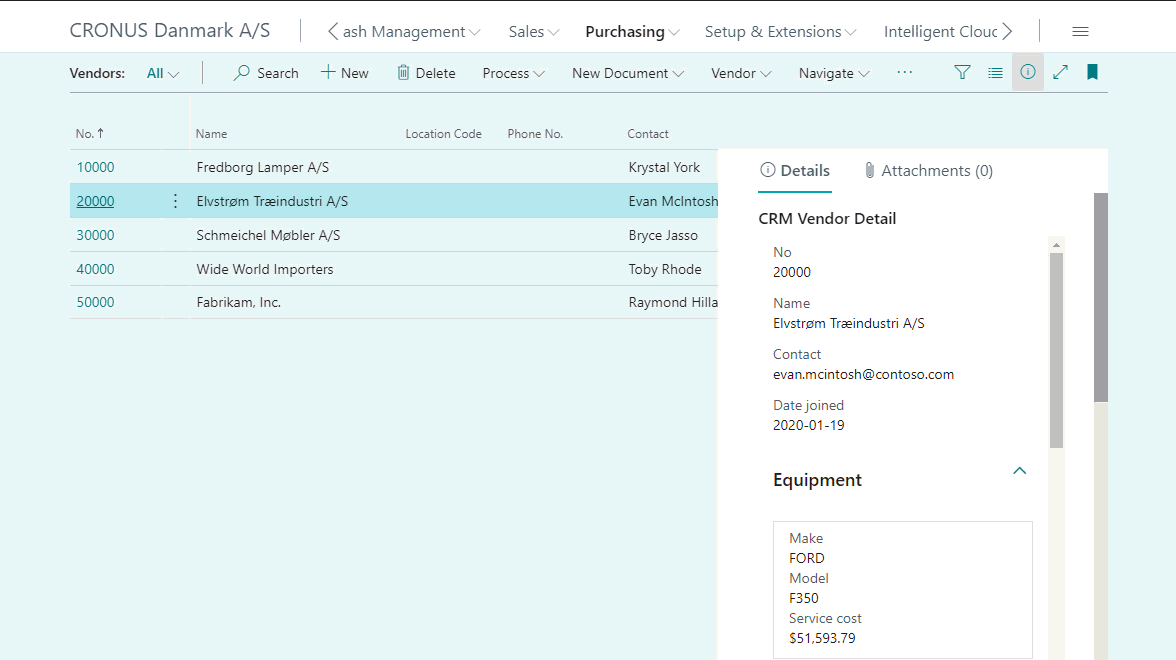
FactBox on a List Page
1. Create the JavaScript file that will be displaying the Popdock Widget as an Iframe. You do not need to modify the JavaScript from my below example.
2. Create a Control Add-in object to call the custom JavaScript. You will need to modify the location of the Startup Script to point to your JavaScript file.
3. Create a Card Part to call the Control Add-in. You will need to modify the user control to point to whatever you named your Control Add-in. You can use any field in the source table as a filter variable for your widget.
*It is important to specify the SourceTable so Business Central knows where to retrieve the fields you will use as parameters.
4. Finally, create a Page Extension on the list page to be modified. You can modify the part to reference reference the name you gave the Card Part.
*It is import that a SubPageLink is established so when a different record is selected from the list, the Iframe will refresh with new data.
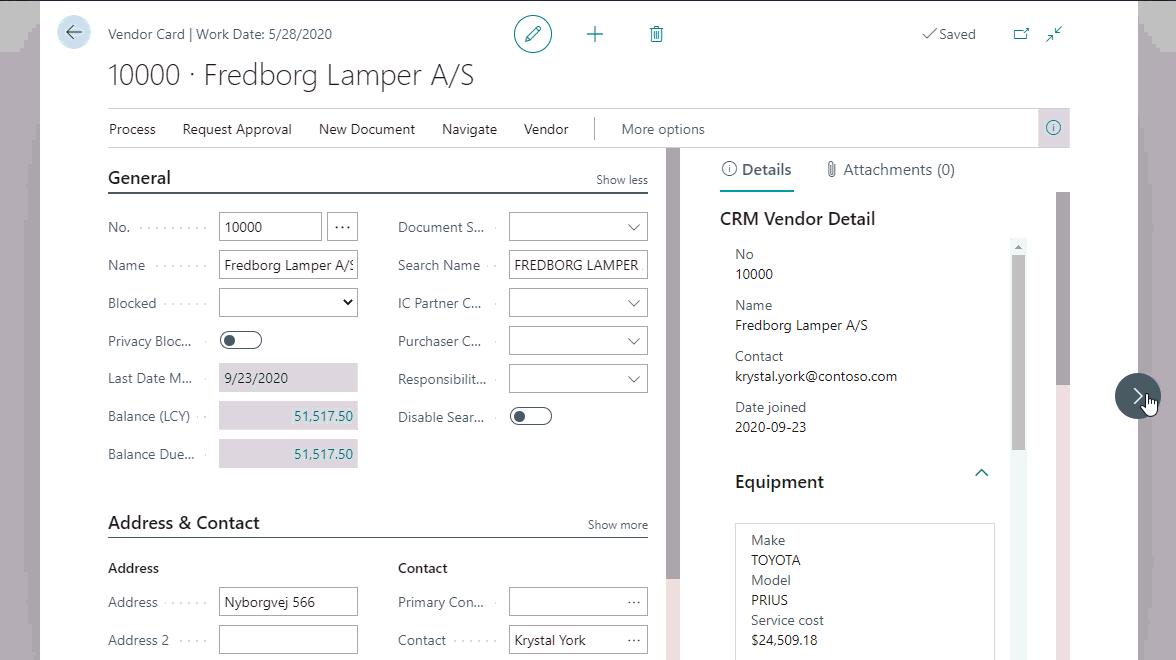
FactBox on a Card Page
1. Create the JavaScript file that will be displaying the Popdock Widget as an Iframe. You do not need to modify the JavaScript from my below example.
2. Create a Control Add-in object to call the custom JavaScript. You will need to modify the location of the StartupScript to point to your JavaScript file.
3. Create a Card Part to call the Control Add-in. You will need to modify the user control to point to whatever you named your Control Add-in. You can use any field in the source table as a filter variable for your widget.
*It is important to specify the SourceTable so Business Central knows where to retrieve the fields you will use as parameters.
4. Finally, create a Page Extension on the card page to be modified. You can modify the part to reference the name you gave the Card Part.
*It is import that a SubPageLink is established so when switching records the Iframe will refresh with new context sensitive data.
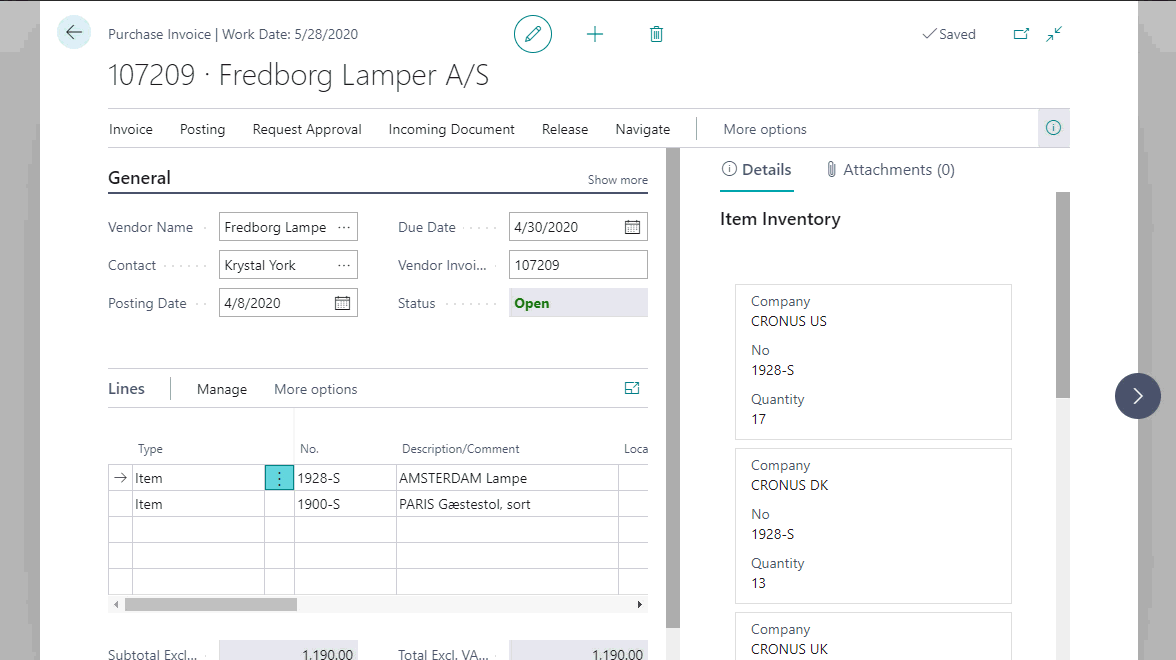
FactBox linked to a Subform
1. Create the JavaScript file that will be displaying the Popdock Widget as an Iframe. You do not need to modify the JavaScript from my below example.
2. Create a Control Add-in object to call the custom JavaScript. You will need to modify the location of the Startup Script to point to your JavaScript file.
3. Create a Card Part to call the Control Add-in. You will need to modify the usercontrol to point to whatever you named your Control Add-in. You can use any field in the source table as a filter variable for your widget.
*It is important to specify the SourceTable of the subform referenced(“Purchase Line” in this example) so Business Central knows where to retrieve the fields you will use as parameters.
4. Finally, create a Page Extension on the page to be modified. You can modify the part to reference the name you gave the Card Part.
*It is import that the Provider and SubPageLink are pointing to the same table as your CardPart references(“Purchase Line” in this example). This will make the Iframe refresh each time a different subform item is selected.
Now you will see your Popdock widgets in Business Central FactBoxes!