- On the left side options column click Connections.
- On the Connections page click on the Create Connection button.
- On the New Connection page click on the Microsoft Dynamics CRM icon.
- The page to configure the Dynamics CRM connection opens.
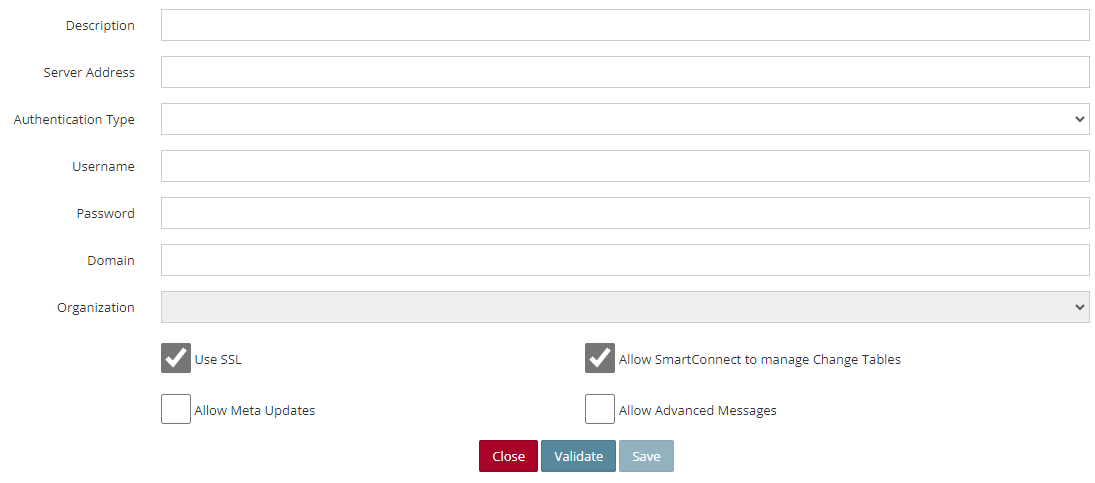
- Description – Enter a description of the connection.
- Server Address – Enter the default CRM server and port. Do not enter the http/https prefix.
- For Active Directory installations the server name is required. If the CRM server is not running on port 80 the port number should also be entered.
- For CRM Online installations just the CRM server name should be entered (e.g. crm5.dynamics.com). The organization name and port number are not needed.
- For Internet Facing Deployments, the server name should be prefaced with the discovery service alias (usually dev).
- Authentication Type – The available options are:
- Active Directory
- Internet Facing Deployment
- Username – Enter the username to be used to connect to CRM. (Note: if nonstandard ports have been used for an IFD installation, the full username may be required to connect to CRM e.g. administrator@dev.eonesolutions.com)
- Password – Enter the password to be used to connect to CRM.
- Domain – Enter the AD domain of the user to be used to connect to CRM. (Not required for CRM Online, or CRM Online Federation).
- After the above fields are populated, click Validate. This will validate the connection to Dynamics CRM and populate the Organization field with the available orgs.
- Select the Organization to be used.
- Use SSL – Mark this checkbox if SSL encryption will be used for this connection.
- Allow Meta Updates – Mark this checkbox if users can update meta data information within CRM.
- Allow SmartConnect to manage Change Tables – Mark this checkbox if SmartConnect is to manage the creation of CRM change tables and change transactions.
- Allow Advanced Messages – Mark this checkbox if users can use the advanced messaging for CRM within SmartConnect.
- Save the connection.