You will first need to upload the Shopify Rest Service by following the below instructions:
- From the main Navigation Menu, select Maintenance and then REST Services.

- On the REST Services page, click the Import Rest Service button.
![]()
- This opens the Import Rest Service window allowing you to upload the Json File linked here.

- After you have selected the file, you can press the process import button.
Now you can add the connector by following the below instructions:
- On the left side options column click Connections.
- On the Connections page click on the Create Connection button.
![]()
- On the New Connection page click on the Shopify icon.
![]()
- The page to configure the Shopify connection opens.

- First, set up a Shopify app that will give you access to the Shopify API.
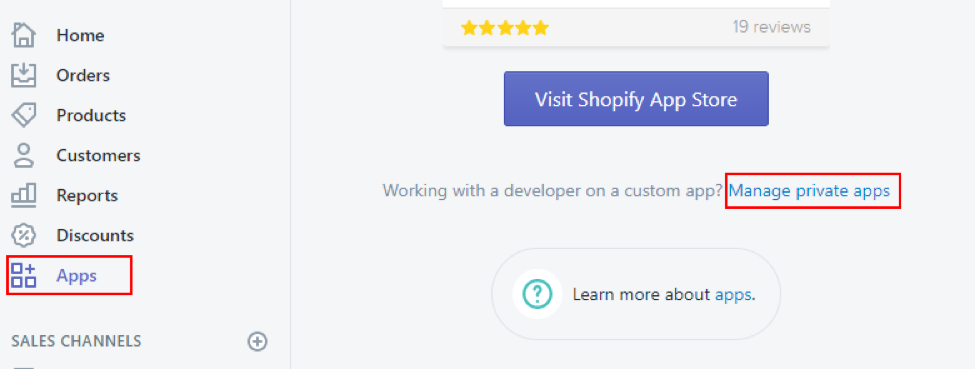
- Log in to your Shopify account with a user that has permission to create an app.
- Navigate to Apps > Manage Private Apps
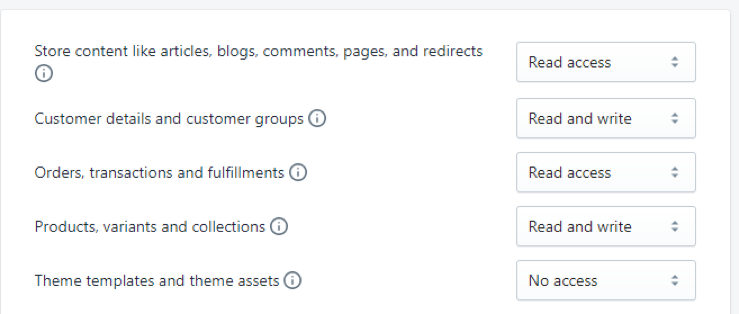
- Enter a Private App Name of your choice and then set the permissions appropriately for what you need to do with integration. *If you are planning on using Shopify as a Data Source only, you’ll need to set Read access for all endpoints.
- The REST Provider that will be included in this article will be set up to GET Orders and POST products and customers so you will need Read and write access for those endpoints.
- The Username is the API Key, and the Password is the Admin API access token in the Connector setup.

- The Final Setup Required is to change the storename variable to your store name.

- Click Save