- Click on the Target tab.
- Target – Select Dynamics 365 Finance & Operations.

- Destination – Select a Finance & Operations connection.
- Company – Select the company that will be used. The Default Company setup on the connection will automatically be selected.
- Service Endpoints – Click “Add Service” to add the service that will be integrated to. Once a service is selected, the child endpoints options will be enabled.
- Disable Parallel Send – If this is checked, the records will send one at a time and wait for a response before it continues. When it is unchecked, it sends up to 10 records at once. (Note: If there are document level scripts in tasks, parallel send is automatically turned off since that requires each document to complete before moving to the next one.
- Remove Blank Properties – Check to remove blank values before it sends to F&O.
- Run to file – Select this option to run the data to a file instead of into the F&O Company.
- Target Lines – Displays the lines that will be available to be mapped on the Integration tab.
- Once the required fields have been populated the Integration tab becomes active.
- Click on the Integration Tab.
Adding a Child endpoint
Once a service has been selected, the child endpoint option will be enabled. Child endpoints will be used any time a detail or line endpoint needs to be sent with the header endpoint.

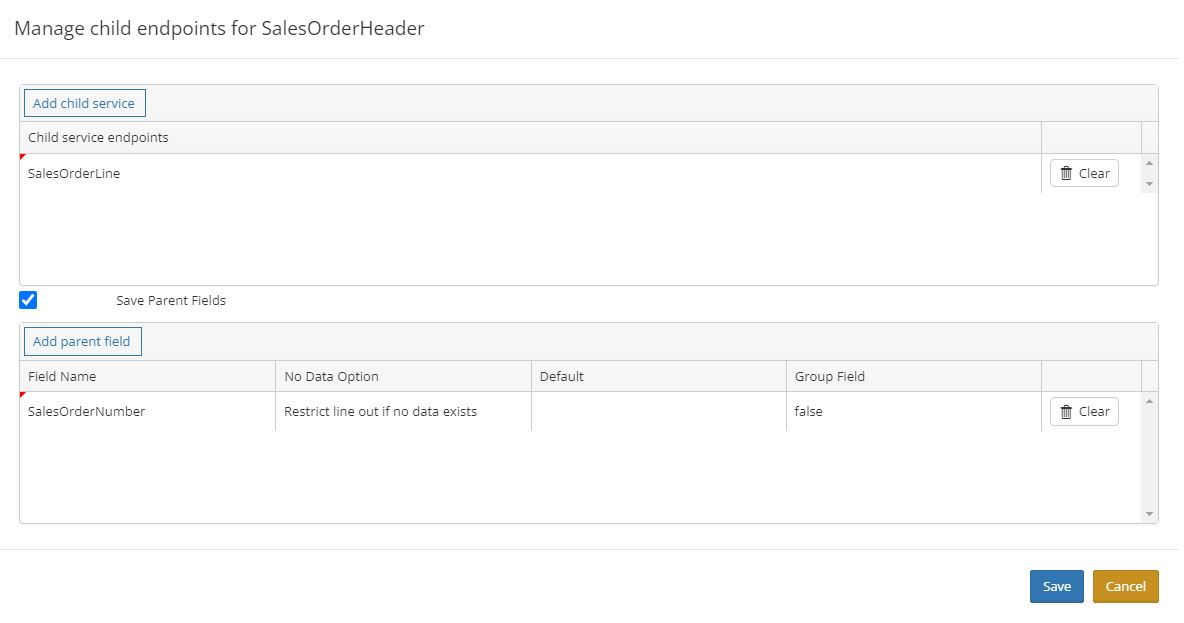
- Click “Child endpoints” to create a child endpoint for the selected service, this will open the Manage child endpoints window.
- Click “Add child service” to add a child to the selected service. For example, adding sales order lines to a sales order header service.
- Check the “Parent Fields” checkbox if you want to add a parent field to the child service. The Parent field is used to link the lines back to the header.
- Click “Add parent field” to select a field from the parent service that can be used on the child service. This field will be mapped on the child node during the mapping process.
- Click save on the Manage child endpoints window.
Integration Tab
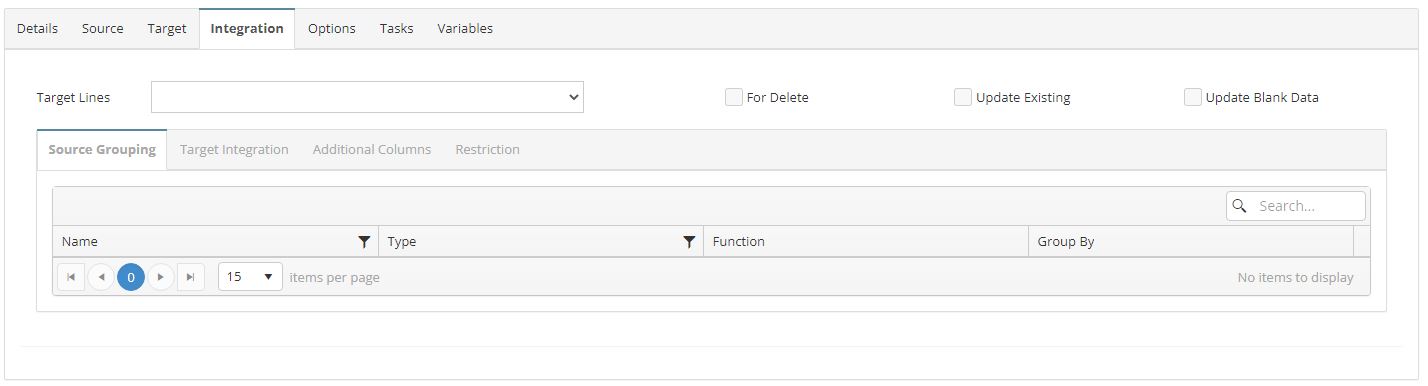
- Target Lines – From the dropdown list select the lines that will be mapped.
- For Delete – When this checkbox is marked, records from the destination that are in the source will be removed.
- Update Existing – When this checkbox is marked, records that already exist will be updated with any changes.
- Update Blank Data – Not used for this destination type.
- Source Grouping tab – Select which source(s) to group by and the function for the source.
- Target Integration tab – This is where the Source data is mapped to the Target data.
- Additional Columns tab – note: there will be a separate section for each type of Additional Column.
- Once the Target field(s) are mapped to a Source(s), the Save button becomes active allowing the user to save the Integration Process.