Popdock’s security features ensure additional users have access only to the data they need. The first user is the default Administrator and a second Administrator can be designated. An Administrator is the only role with authority to add users to the Popdock account. The Administrator has the ability to create teams, create roles, invite users, assign teams, and assign roles. To protect your data, a team or each individual user added can be assigned access to specific connectors and lists at the Administrator’s discretion. This is an overview of these Security options for your account.
Best Practice: Before adding users we recommend defining Teams and Roles in Popdock security. While inviting users they can be assigned to Teams and Roles that already carry the permissions needed to securely view the data they need. Creating Teams and Roles first will save time when adding users in the future. Until users are given permissions for connectors, companies, and lists, they will not have the required permissions to view their data.
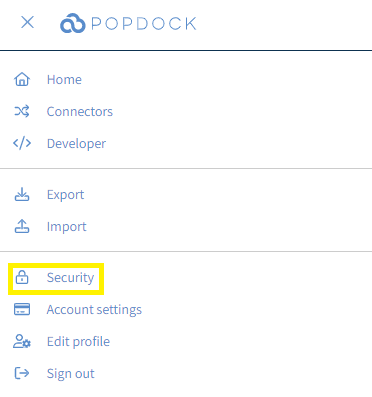
To navigate to Popdock Security, click on the triple bar menu on the upper left corner of the Popdock home page and click on Security from the drop down menu.
Teams:
A team is a group of users with the same permissions to access connectors, lists, details, and actions. For example, you can have an Accounting department that has access to Accounting data, but then have a Sales department that has access to sales data and cannot access the accounting data.
To Create a Team:
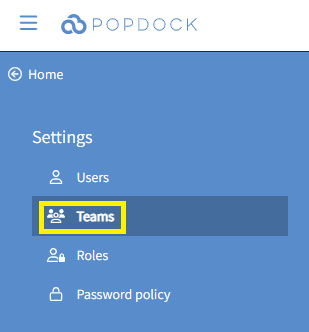
1. From the Popdock Security Page, click on Teams in the left Settings menu.
2. Click +Add Team in the upper right corner of the page.

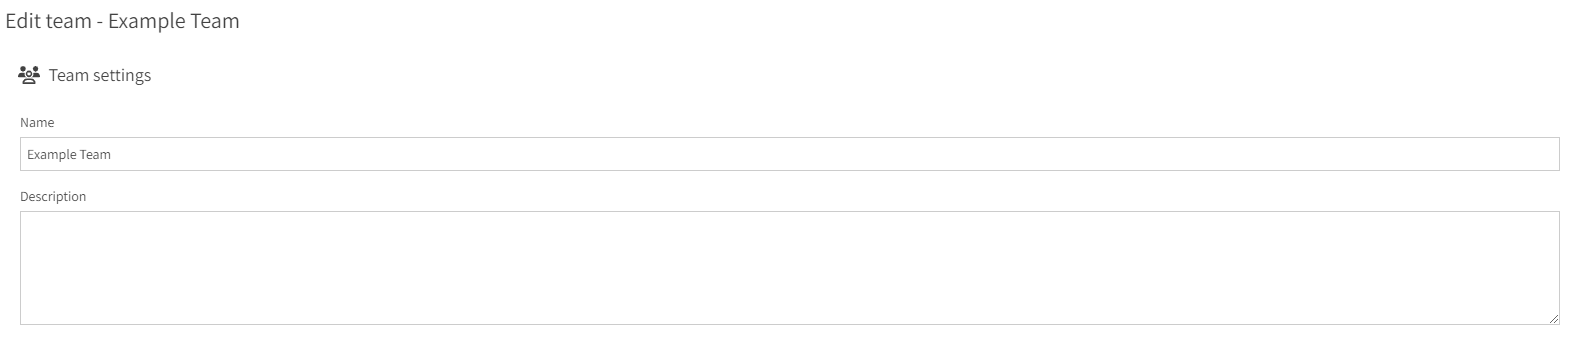
3. Give your Team a Name and then press tab. A description field will appear where you can add a description for your team.
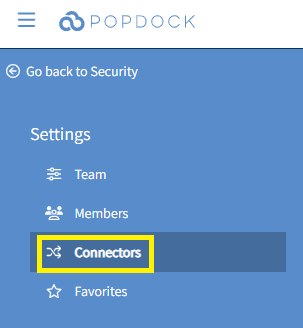
4. Click Connectors from the Settings Menu.
5. Select the Connector(s) you would like to add to the team. As you add connectors, they will get added under Connectors in the Settings menu.
6. Click a newly added connector from the left Settings Menu.
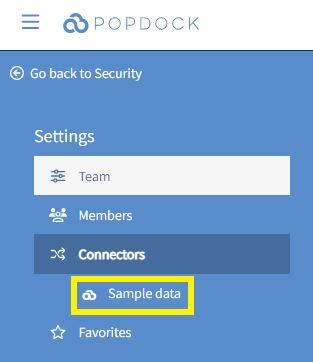
7. Select which Companies, Lists, Details, and Actions this team needs access to from within this connector.
Note: Favorites can also be assigned to a team, rather than assigning a favorite to an individual user.
Roles:
Roles define the activities users are allowed to take in Popdock. Permissions granted in roles apply to all connectors, lists, and details that the user has been granted access to based on the Popdock Team they are assigned to. Administrators can create custom roles within Popdock, but by default Popdock has 3 roles: Developer, Manager, and User (these roles can be edited). Administrators can assign roles to a single User or multiple Users, and multiple roles can be assigned to a single User.
To Create a Role:
1. From the Popdock Security Page, click on Roles in the left Setting menu.
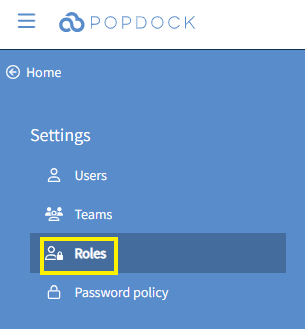
2. Click +Add role in the upper right corner of the page.

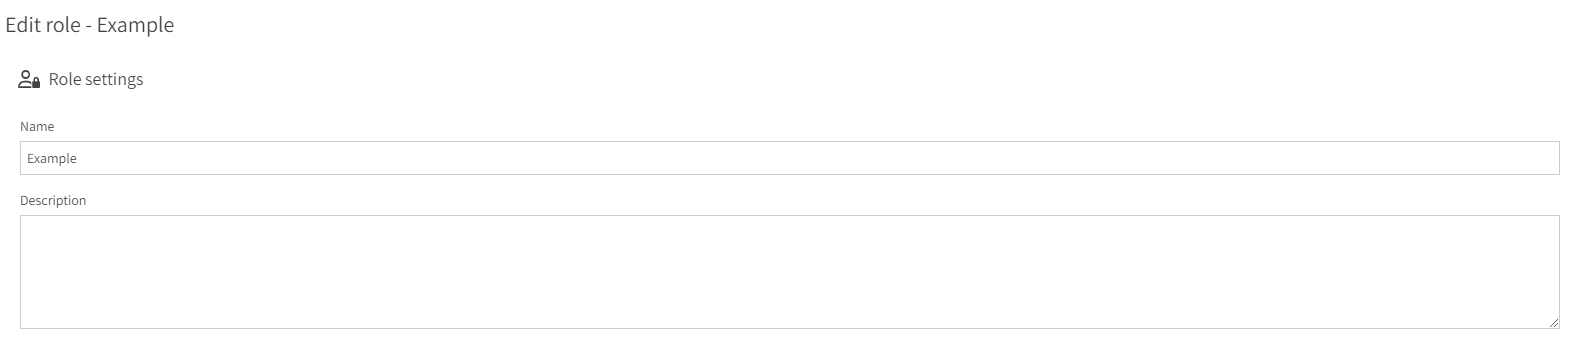
3. Give your Role a name and then press tab. A description field will appear where you can add a description for this Role.
4. Click Permissions from the left Settings Menu.
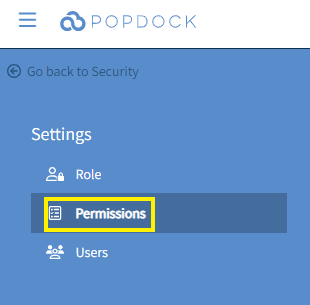
5. Select which permissions you want to assign to this role.
Users:
Users are individuals with a named account in the Popdock web app that can consume data from lists that have been created for each connector. Users are added by Administrators in the Popdock Security menu. Instructions on how to send the invitations are on the following Knowledge Base Article: How to invite a user to be added to your Popdock account. Know that when sending an invitation to one or more Users, you can assign them to a Team and/or assign them a role. A User can be assigned to multiple Teams and multiple Roles. Additionally, each User can be assigned access to specific connectors, lists, details, and actions like in Steps 1-7 under Teams.
Questions about Popdock Security? Email support@eonesolutions.com.