- On the Integration tab click on Additional Columns tab.
- Click on Add Additional Column button.
- The Additional Column window will open.
- Name – Enter a name for the column.
- Tab off the Name field to enable the Type field.
- Type – Select Finance & Operations Lookup from the Type dropdown list.
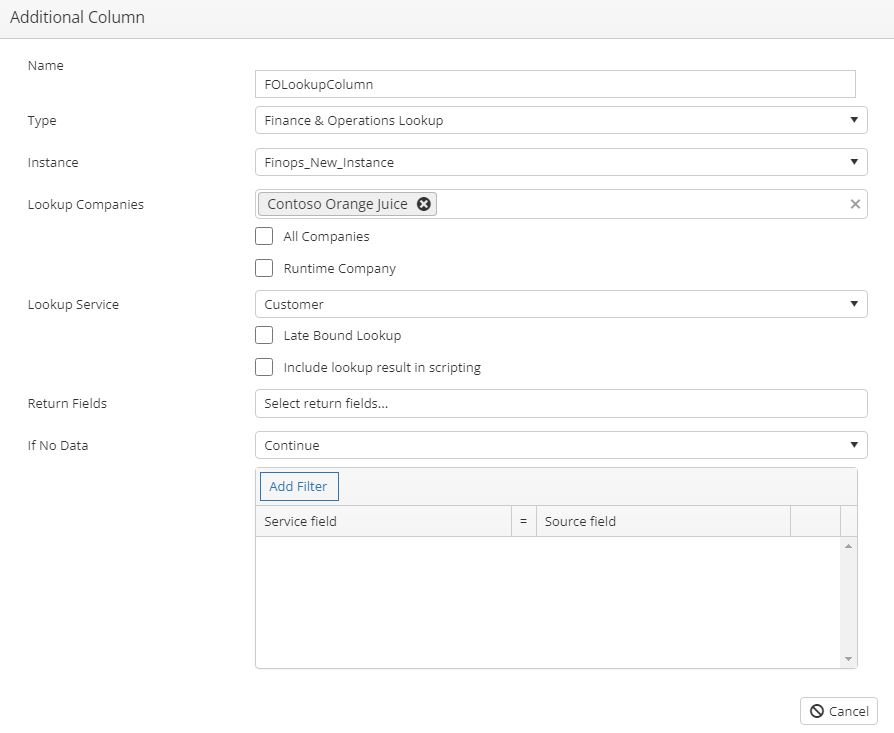
- Instance – Select the F&O Instance to be used.
- Lookup Companies – Select the F&O Companies that the lookup will use.
- All Companies – Check the “All Companies” checkbox if you would like the lookup to use all companies.
- Lookup Service – Select the name of the service the lookup will use.
- Late Bound Lookup – If checked, the lookup will be performed after all other processing is completed.
- Include lookup result in scripting – Check this option if the lookup value will be needed in any scripting, for example in a calculation or a run script task.
- Return Fields – Select the Return Fields that will be used in the integration.
- If No Data – Select the if no data option. This tells the integration what to do if no data was found in the lookup. Options include,
- Continue
- Return default value
- Restrict line out if data exists
- Restrict line out if no data exists
- Return failure for current integration line
- Return NULL
- Stop processing integrations.
- Filter Fields – click Add Filter to enter the matching details for the lookup.
- Service Field – Select the service field.
- Source Field – Select the source field that will match the service field.
- Save the settings.