- On the Integration tab click on Additional Columns tab.
- Click on the Add Additional Column button.

- The Additional Column window will open.
- Name – Enter a name for the column.
- Tab off the Name field to enable the Type field.
- Type – Select MultiList Option Lookup from the Type dropdown list.
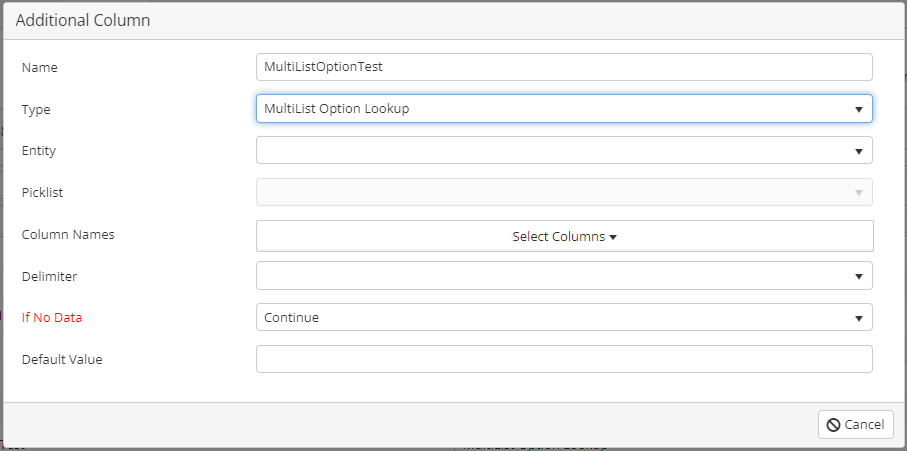
- Entity – Select the entity that contains the required list option.
- Picklist – Select the required list of options.
- Column Name – Select the source column(s) that contain the data to be looked up within the CRM Server.
- Delimiter – Select the delimiter used in the source column for the multiple options.
- If No Data – Select the required option if not data is found when filtering lookup values with the supplied value.
- Continue – SmartConnect will continue the integration even if no data is found.
- Return default value – SmartConnect will return a default value for the option set if the supplied value does not match a value in the option list.
- Return failure for current integration line – SmartConnect will return a failure of the current integration line if no data was found.
- Stop processing integrations – SmartConnect will stop processing if the supplied value does not match a value in the option list.
- Default Value – If “Return default value” has been selected, enter the default value to be returned.
- Save the column settings.