Dynamics 365 Finance and Operations connections require using OAuth. Follow the steps below to setup an OAuth token.
Setting up the application in Azure:
- Navigate to portal.azure.com
- Search for App registrations in the top search bar and select App registrations.
- Click New Registration and enter a name for the application.
- Choose the appropriate Supported Account Type, most companies will use “Accounts in this organizational directory only”.
- For the Redirect URI, choose Web and enter the correct URL based on deployment/region:
- This is specific to your SmartConnect region, so it will vary slightly depending on that. When setting up a Dynamics 365 Finance and Operations connection, the redirect URL will be displayed in the connection window.
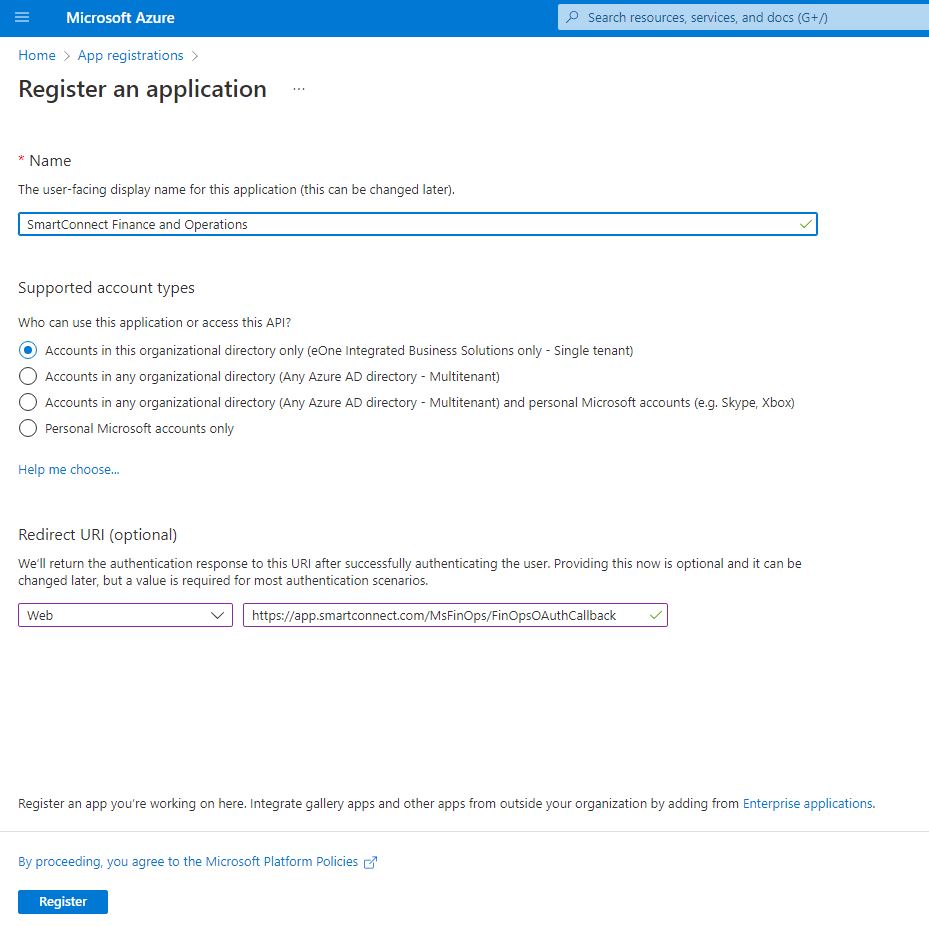
- Click Register.
- Click “Certificates & secrets” in the navigation on the left.
- Click “New client secret”.
- Give the secret a description and choose how long you want the secret to last. It is important to note that when the secret expires any connections using this secret will no longer connect successfully until a new secret is generated and used in the connection. Make sure to have a process in place for someone to create another secret and update any SmartConnect connections prior to the secret expiring in the future.
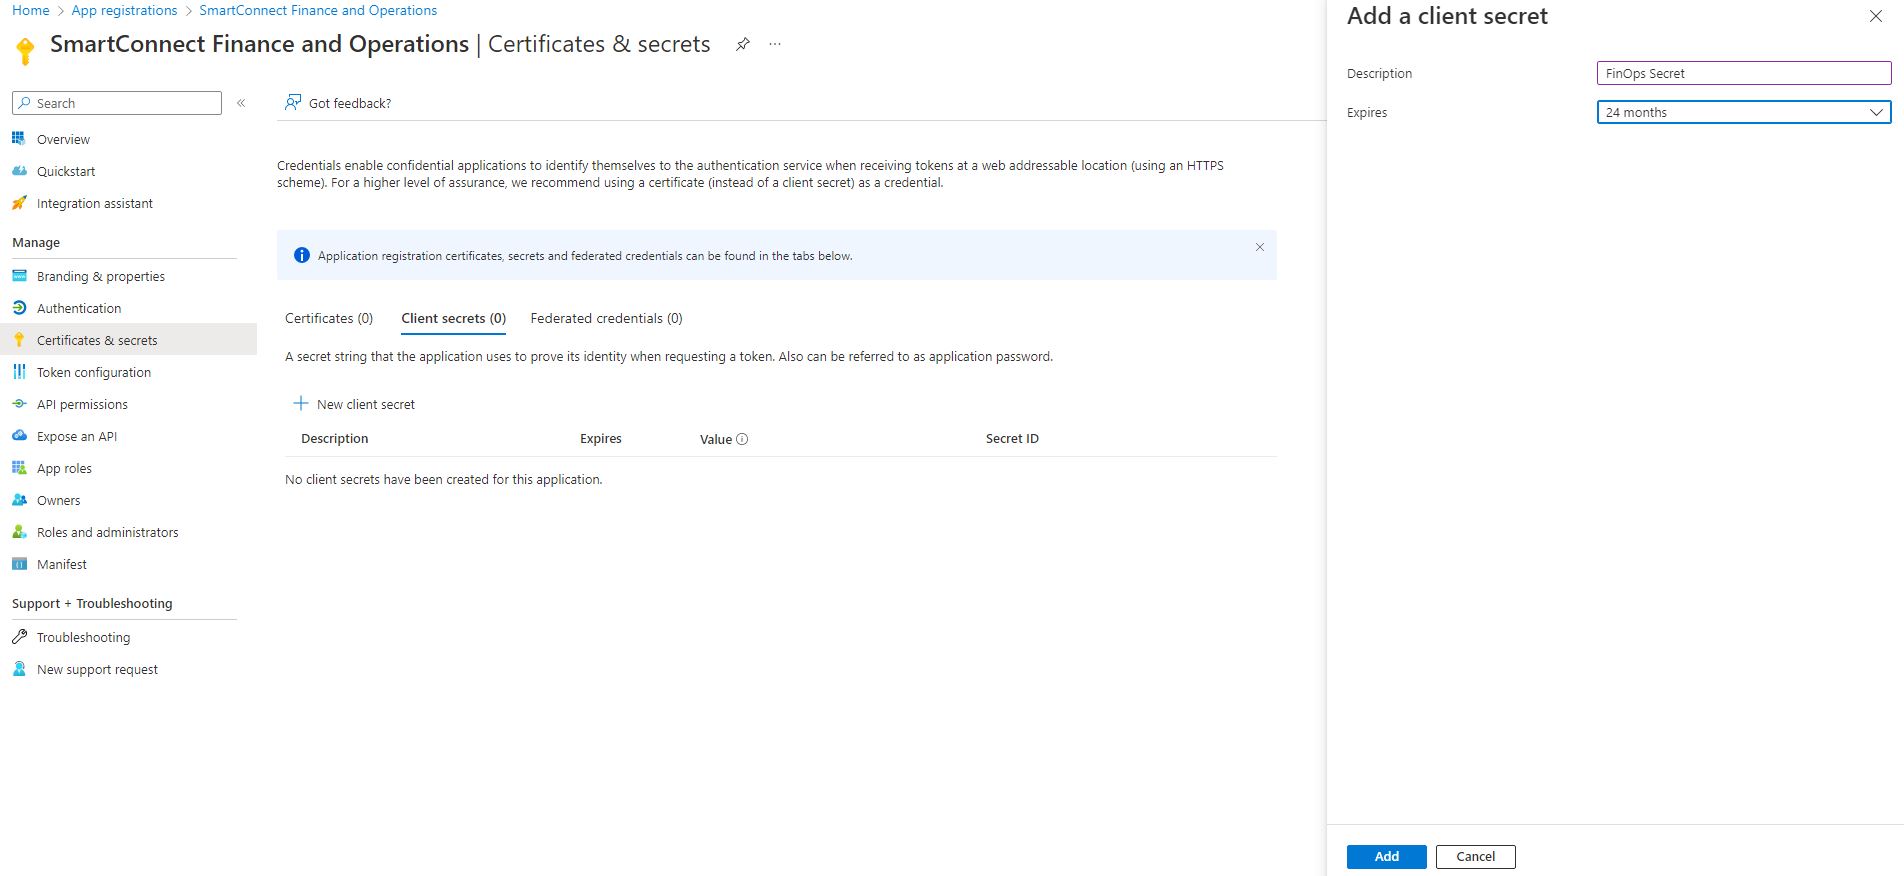
- Click Add to generate the new secret. Copy and save the Value somewhere as it will not be fully visible again once you navigate away from the Azure Portal.

- Click on “API Permission” in the navigation bar on the left.
- Click “Add a permission” and choose Dynamics ERP.
- Select Delegated permission if it is not already and enable AX.FullAccess, CustomerService.FullAccess, and Odata.FullAccess and click Add permissions.

- Click on Overview in the navigation bar on the left.
- Copy and save the “Application (client) ID” value.
- With the Application ID and the Secret Value copied and saved from the application setup, the Azure Active Directory Application can be setup within Finance and Operations.
Setting up Azure Active Directory Application in Finance and Operations:
- Login to Finance and Operations and Navigate to Azure Active Directory Applications.
- Enter the Client Id from the Azure App registration.
- Enter a name for the Azure Active Directory application.
- Select an appropriate service account user ID. For this example, we have selected the Admin However, as a better practice, you should provision a dedicated service account that has the correct permissions for the operations that must be performed.
- Click Save.
Setting up the connector in SmartConnect:
- Login to login.smartconnect.com if not already.
- Navigate to Connections and click the Create Connection button.
- Select Dynamics Finance and Operations.
- Enter a description for the connector.
- Enter your Site Uri – this will be the base URL (ie. https://<<yourinstance>>.cloudax.dynamics.com).
- Enter the same Application Id (Client ID) from the application that was registered in the Azure portal. It can be found on the Overview page in Azure Portal.
- Enter the Client Secret value from the application, if the secret value was not saved when registering the application then a new secret and value will need to be created.
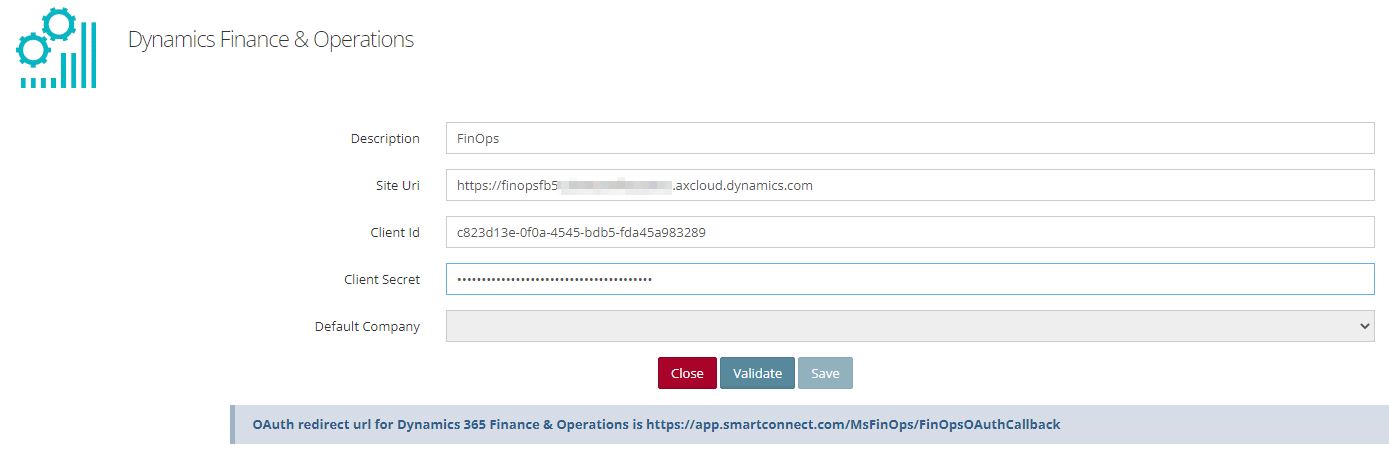
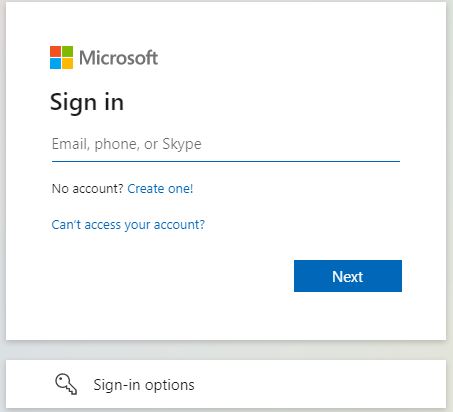
- Click Validate. This will start the OAuth process and you will be directed to a Microsoft login if not already logged in. If you were still logged in, you will be asked to grant permissions. Click accept to grant the permissions. If your user does not have the proper permissions, you will need to have an admin user grant the permissions.
- Note: It is important for the browser to prompt for credentials at this time. If the browser automatically signs the user in, it may not be the correct account authorizing the application.

- After successful validating you will be redirected back to the Finance and Operations connector and can now choose your company.
- Default company is the company that SmartConnect will use as the default.
- System Company is the default company for the authenticated user within Finance and Operations. This is an information only field.
- After successfully completing the validation and access steps, you can now save the connector.