In this example, we will show you how to add a calculated field to your list. Let us say you have a scenario where you are taking donations for a charity event that benefits the Girl Scouts of America and the Boy Scouts of America. All proceeds will be divided evenly between the two organizations. The event ran for the month of February, all transactions were processed in Stripe, and they were given the description of “50/50 Charity Donation”.
Important Tip
Calculated fields can use Popdock Script, C#, and SQL (where applicable) operators and methods. In this example, we will be using C#.
How to add calculated fields to a list:
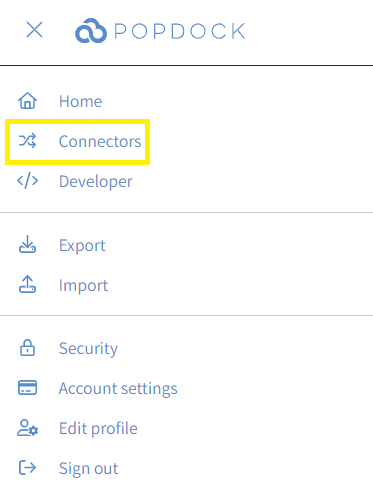
1. From the Popdock homepage, click the Triple Bar icon in the upper left corner of the page.

2. Then click on Connectors in the available drop down menu.
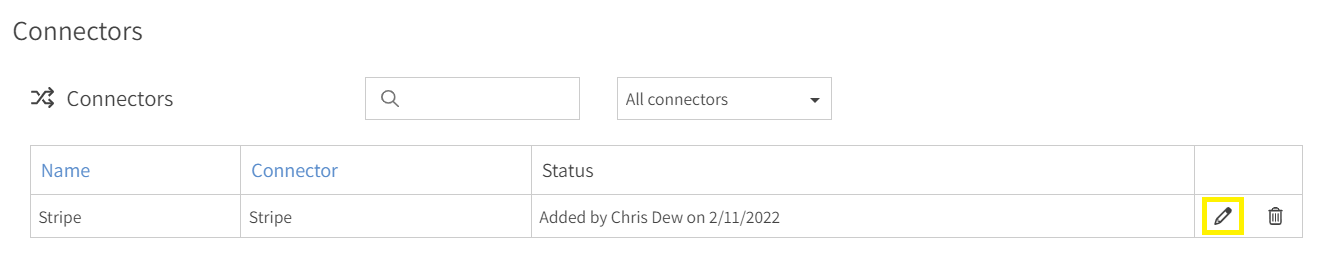
3. Next click on the Pencil icon (Edit) next to the connector that contains the list that you would like to add the calculated field to.
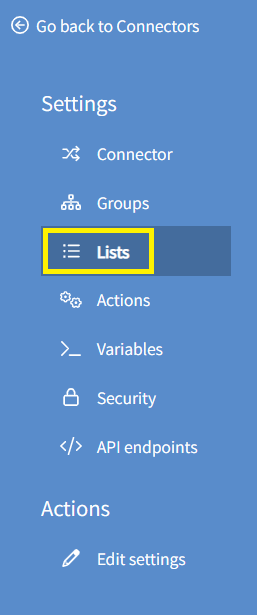
4. Now you want to click on Lists on the left navigation menu.
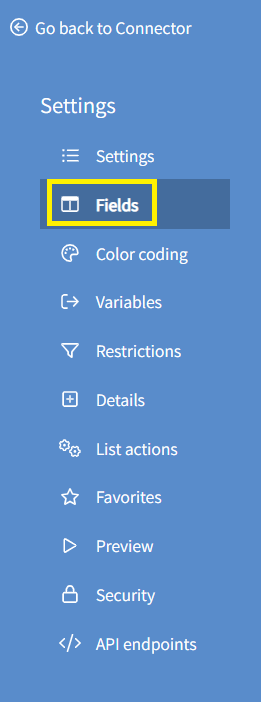
5. Click the edit icon next to the list that you want to add the calculated field to. For this example we will choose the edit icon next to the Payments list. Then choose Fields from the left navigation.

6. Here you will want to hide the fields section and show the calculated fields section. Click on +Add calculated field.
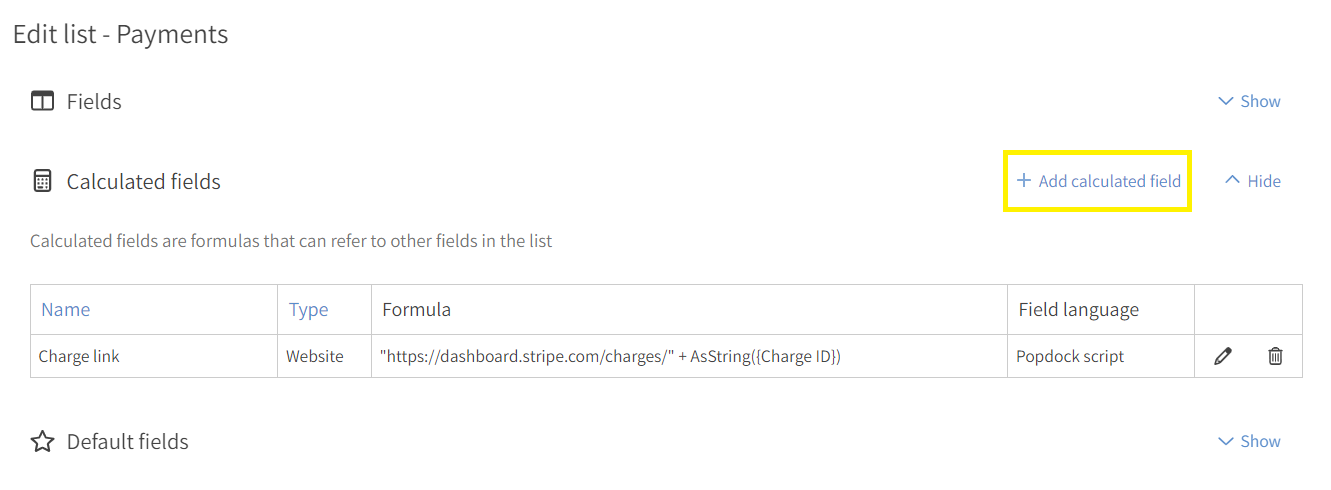
7. The Edit calculated field page will appear. Here you will want to give the field a name, select the field type, and enter the formula for the calculation. Here is a Guide for help creating your formula. For this example it is a simple one, the field type is currency and we are taking the “Amount” field and dividing it by 2 for the calculation. The correct syntax when identifying a column in a list is surrounding the column name with curly braces like {Amount}. You can also use the Add field drop down to choose a field from the list. Then using C# operators you will add the divided by 2 which is “/2”. All together it is {Amount}/2.

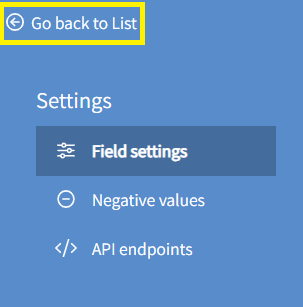
8. With your calculated field created, you can click the Go back to List button to return to the previous page.
9. Repeat steps 6 and 7 if you have more than one calculated field you would like to add. For this example, we are adding a second one which is identical, but named different.
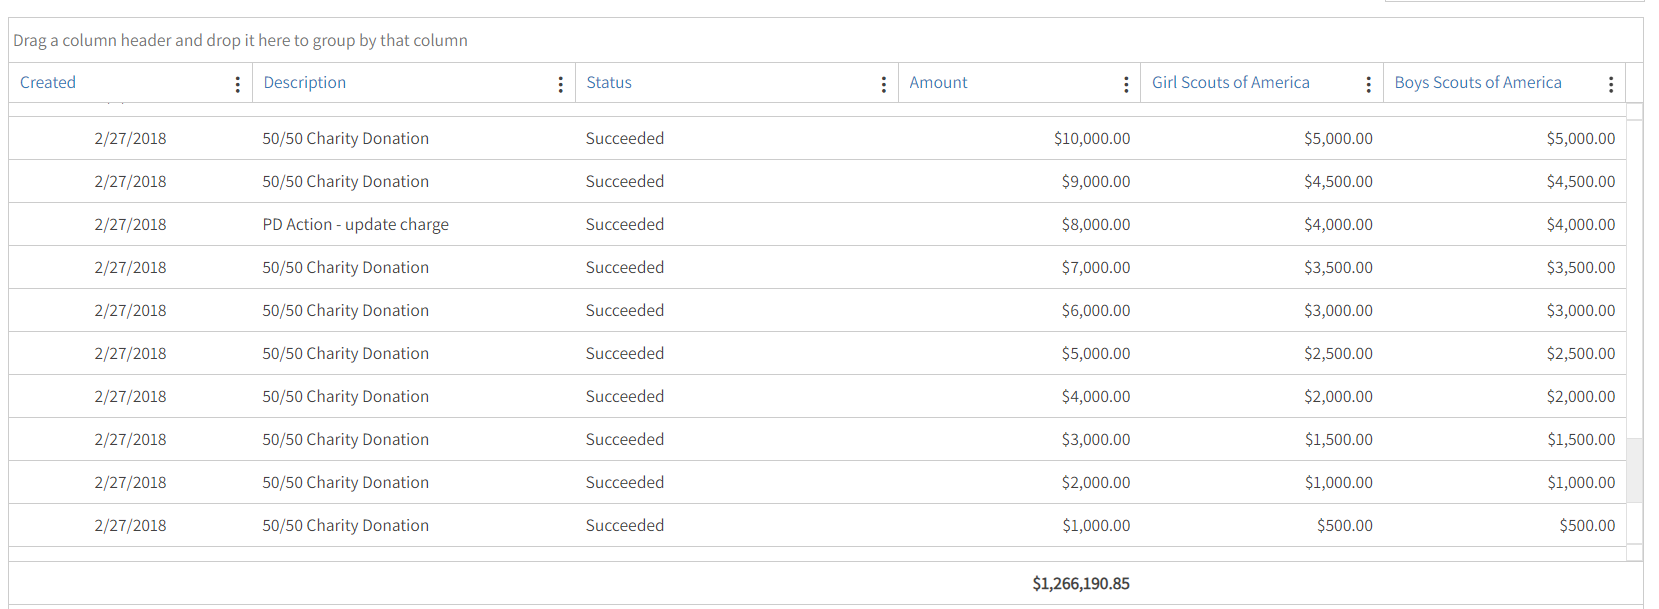
10. After adding your calculated field(s), you can select which fields you would like to show by default or add them manually on the list later. Here I want to go ahead and only show these fields by default: Created Date, Description, Amount, Status, and then the 2 calculated fields I created name Girl Scouts of America and Boy Scouts of America.
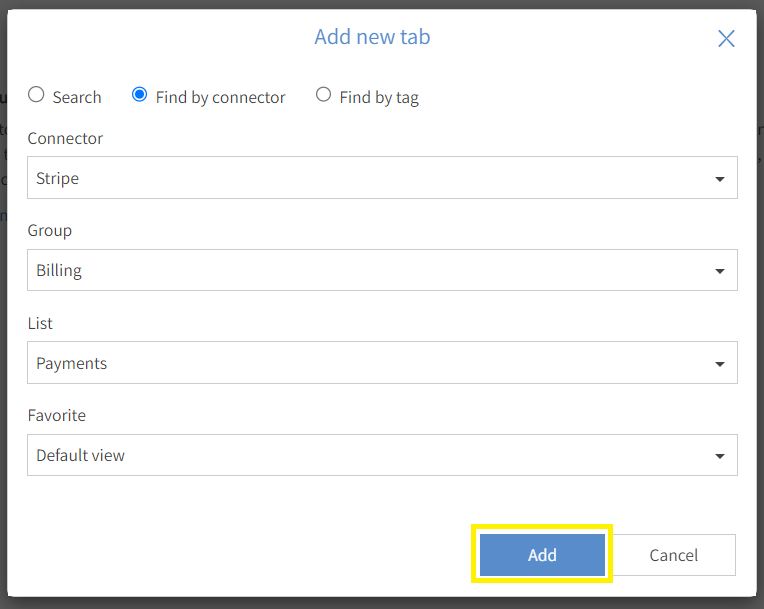
11. After you selected your default fields, your list is ready to be added to a tab. Click the +Add new tab button and complete the drop downs for the list you added calculated fields to, then click the Add button.
If your data from your list and the formula for the calculated field are correct and working, then you should see the new calculated field(s) with the correct data showing.
Important Tip
Please continue to the article “How to add filters to your list” to see the next steps for filtering this result to only the data for the Charity Event example.