In this example, we will show you how to filter your list so you can see the data you prefer to see. For this example we have a Stripe Payment list, but we want to see the results of a charity event that we were accepting donations for in the month of February.
Important Tip
‘and’ & ‘or’ statements behave very differently. When combining two pieces of logic, ‘and’ signifies that both conditions are required for the data to show while ‘or’ signifies that only one condition must be met. These statements can also be used in conjunction.
How to add filters to a list:
1. Click on your list you want to add one or more filters to.
2. Click the Filter link in the top right above your list.

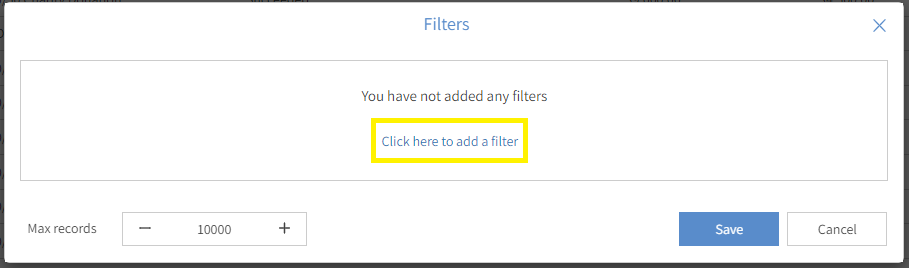
3. The Filters window will appear and click the link that says Click here to add a filter.
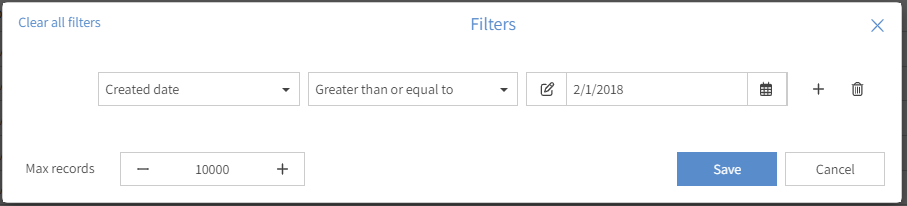
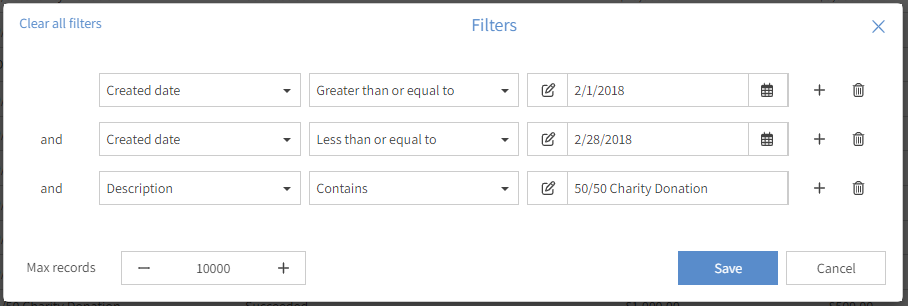
4. For this example there are a few filters I want to add to show the data from the charity event. First I want to filter by Created date to show only dates for the month of February. To do this you have to have first the Created date, Greater than or equal to, 02/01/2018. This means the Created date will be on 02/01/2018 or after.
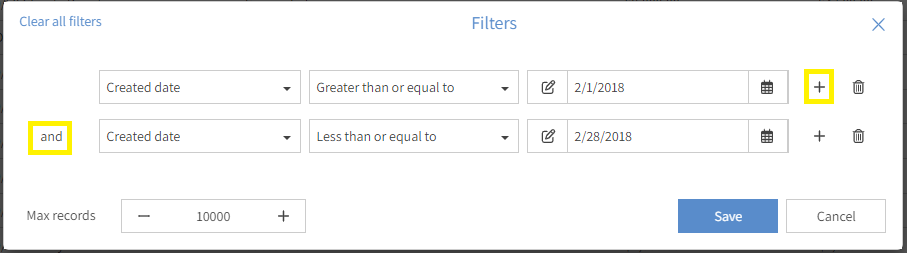
5. Next I want to click the + sign to add another filter and you will see it creates it with an and. I then want to make sure that I don’t get any dates that are after February so I leave it with an and then select Created date, Less than or equal to, 02/28/2018. This means the Created date will be on or before 02/28/2018.
6. Now since I could have had other payments during this time frame, I will want to make sure I filter for only those payments with the description that contains 50/50 Charity Donation. Click the + again to add the filter and select Description, Contains, and enter 50/50 Charity Donation. This will also be an and for the filter because it has to meet all the criteria for the data I want to see.
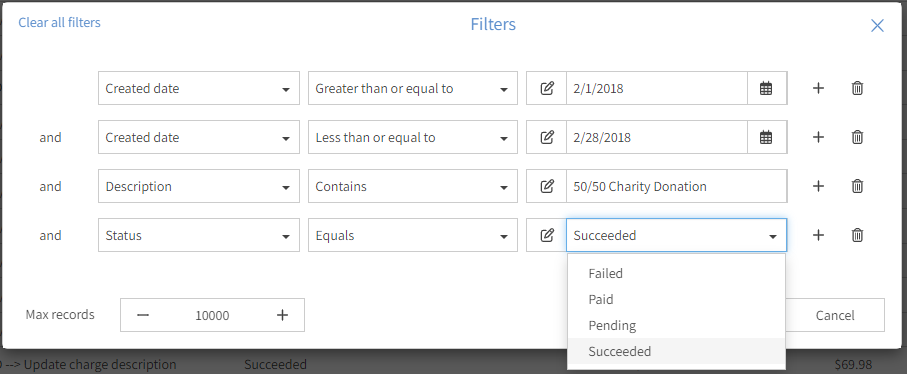
7. Finally, since there is always a chance that a payment may get declined or failed, I want to make sure I filter for Status to equal Succeeded. Click the + sign again to add another filter and select Status, Equals, Succeeded. Notice that Popdock knows the results for the Status field are only a few set statuses so it populates them in a drop down to choose from.
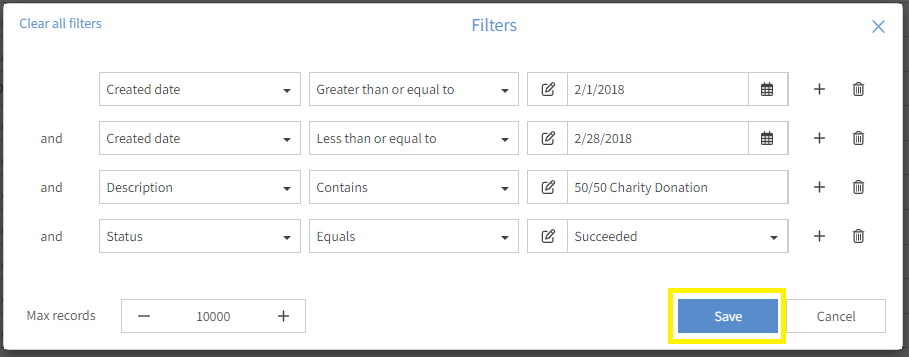
8. This now completes all the criteria I needed for this list and I can click the Save button to see the results.
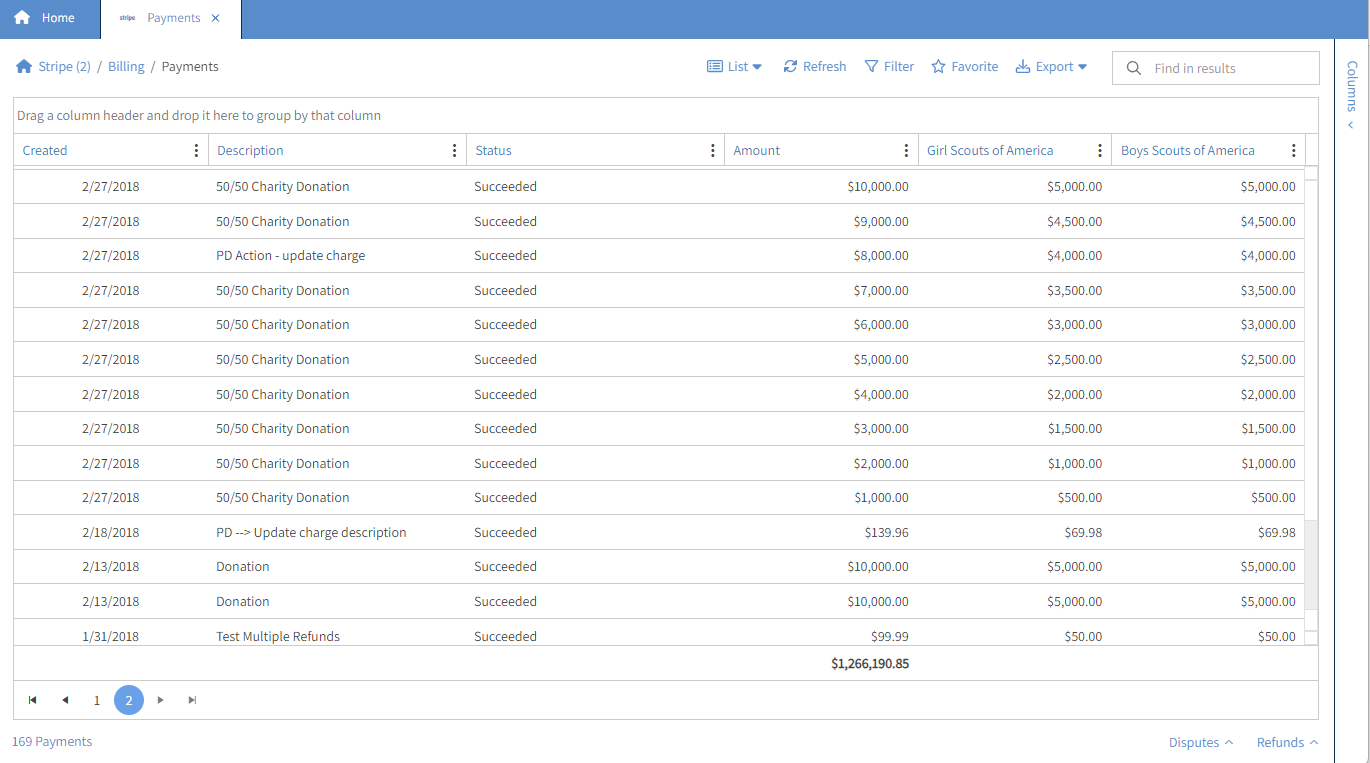
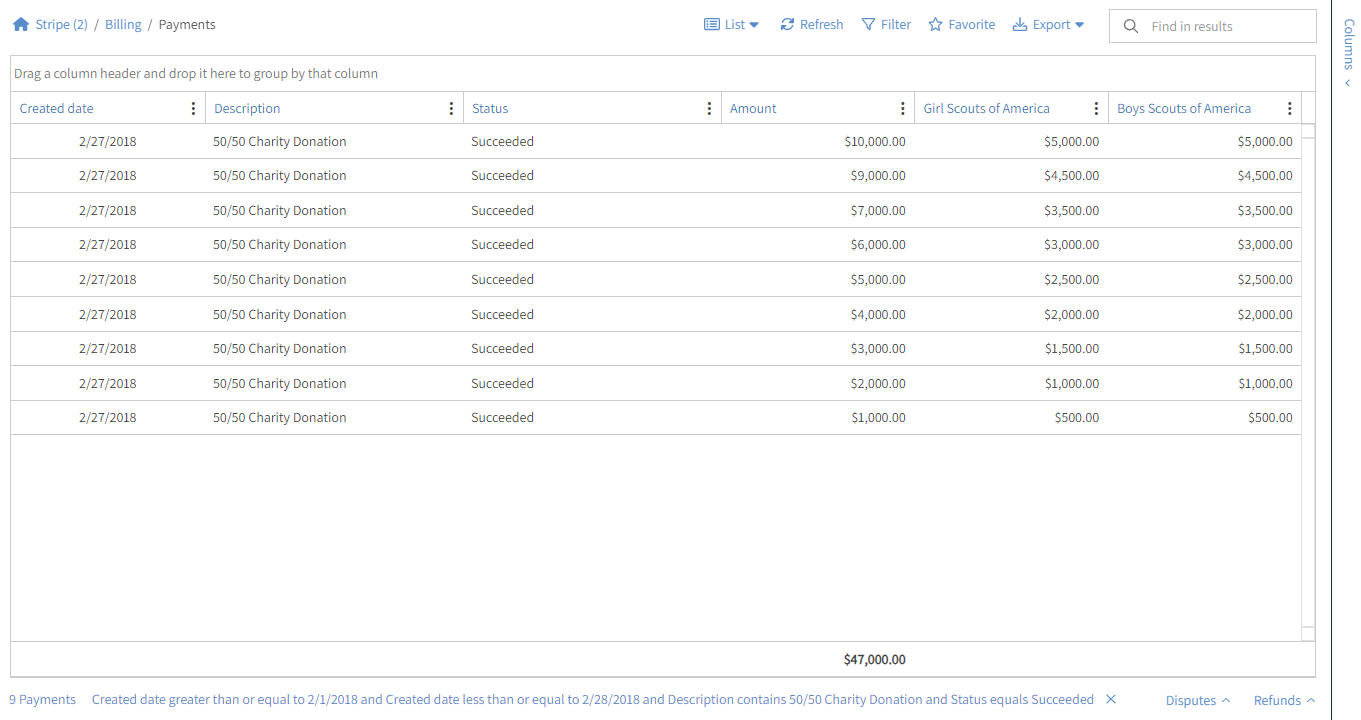
9. The results now show me the data from the month of February, Succeeded payments only, and only the payments with the description of 50/50 Charity Donation. Which includes the 2 calculated fields that were created in a prior knowledge base.
Important Tip
Please see article How to add calculated fields to your list to see the steps for adding fields that calculate data on your list.