Date columns are used to take a field, map it to a date using a specified format, and then output a date in either the same or different format.
To define a date column:
| 1. | Open Map >> Create, or select the Maps Quick Link and double click on the map to be edited. |
| 2. | If creating a new map enter the map id and description. |
| 3. | If creating a new map enter the data source and key field information. |
| 4. | If creating a new map select the required destination, then double click on the mapping type required. |
| 5. | Select Additional Columns from the toolbar at the top of the mapping window. |
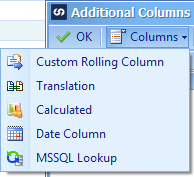
| 6. | Select Columns >> Date Column from the toolbar at the top of the columns window, or double click on the column to be edited. |
| 7. | Enter a name for the date column. Names must be unique within a map. |
| 8. | Select the data source field that contains the required date as Source Date. |
| 9. | Select the source date format. (i.e. the expected format of the source date) If the date format is set to System Format, the date format defined on the SmartConnect setup screen is used. If the required format has not been defined select the Manage Formats button to add a new format. |
| 10. | Select the output format required. If the required format has not been defined select the Manage Formats button to add a new format. |
| 11. | Select ok to save the changes. The date column is now available for mapping to destination fields. |
