The Dynamics CRM file destination takes the information that would normally be sent to CRM via the CRM web service and instead writes it to a text file. This is especially useful when either setting up a new map or troubleshooting as the exact information that would be sent to CRM can be viewed without sending the data to Dynamics CRM.
To create Dynamics CRM File destination:
| 1. | Select create, or select the Maps Quick Link and double click on the map to be edited. |
| 2. | If creating a new map enter the map id and description. |
| 3. | If creating a new map enter the data source and key field information. |
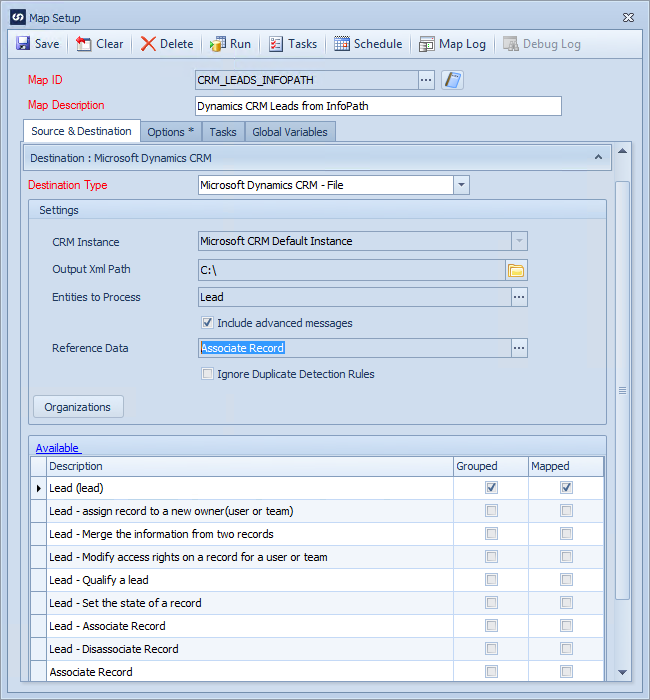
| 4. | Select Microsoft Dynamics CRM - File as the destination. |
| 5. | If this map is to send data to a CRM server other than the CRM server defined under CRM setup, select the organization button and define the new organization / server connection details. |
| 6. | Use the lookup to select a path to write the output files to. Note: an Xml file will be created for each document processed. |
| 7. | If the data is to create / update / delete information for one or more entities within the destination CRM system, select the required entities from the Entities to process lookup. Note: more than one entity may be selected in the lookup. |
| 8. | If the data is to be linked to advanced messages for an entity, ensure that the required entity is selected in the Entities to process drop down. Advanced messages should then appear in the map lines grid. |
| 9. | If the data is to be used to update reference information within CRM, select the required messages from the Reference Data drop down. Note: more than one message may be selected in the drop down box. |
| 10. | If any duplicate detection rules in CRM should be ignored when creating or updating records in CRM, select the Ignore Duplicate Detection Rules checkbox. |
| 11. | If this map is to update more than one CRM organization on this server, select the Organizations button to select the required organization(s). |
| 12. | Double click the CRM entity / messages to be updated by this map. |
| 13. | In the mapping screen map the columns from the data source to the CRM web service fields. |
| 14. | Select OK to save the mappings. |
| 15. | Click Save to record your map changes. |
Notes:
| • | When the map is run one file will be written to the selected directory for each organization / document combination. The output files are named as: |
| o | SC-<Map Id>-<Organization Id>-<CRM Entity>-<record number>-<line number>.xml |
| • | Once a CRM file destination has been tested and approved it may be changed into a Microsoft Dynamics CRM destination without losing any map settings. |