To add a Dynamics NAV/365 Financials destination to a map:
| 1. | Select Create on the Map tab or double click on the map to be edited |
| 2. | Enter the map id and description of creating a new map |
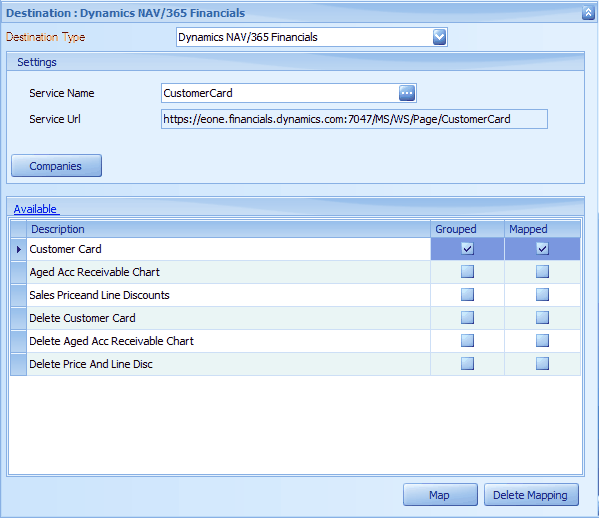
| 3. | Select Dynamics NAV/365 Financials as destination. |
| 4. | Select the Dynamics NAV/365 Financials web service that you would like to integrate into. |
| 5. | By default the company that this integration will run into is pulled from the connector setup |
| a. | To change this click on the companies button and select a different or multiple companies for this integration to run into |
| 6. | Double click the action required on the available lines for this service. |
| 7. | In the line mapping window map the columns from the data source to the columns in the destination |
| 8. | Click ok the save the mappings |
| 9. | Click Save on the map setup window to save the map |