Requests made to the SmartConnect web service may be logged in the SmartConnect web service activity log.
Enable the SmartConnect web service activity log:
As per request security, activity logging may be set up standard across multiple request or individually for specified requests.
To enable the activity log:
| 1. | Log into the SmartConnect client as an administrator. |
| 2. | Select the Web Security button on the Setup tab. |
| 3. | Select the Logging tab. |
| 4. | Select the checkbox beside the required request to enable logging for that request. |
| 5. | Select either 'Use Standard Logging' or 'Specify Logging' as required. |
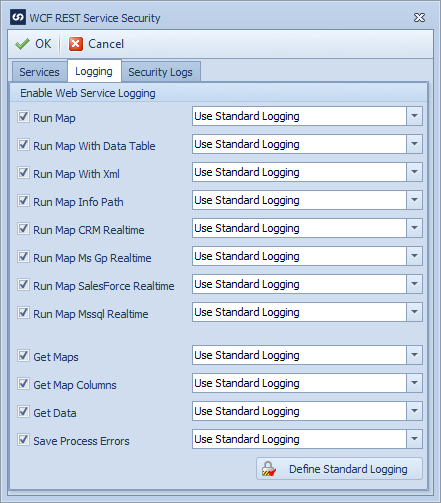
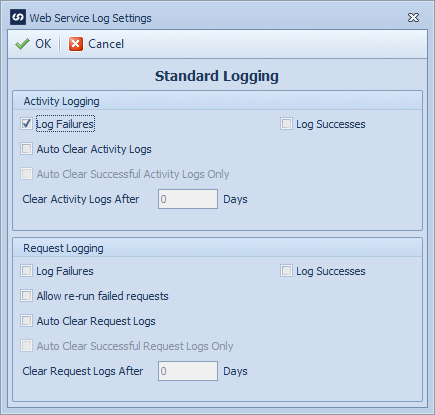
| 6. | If standard logging is selected, select the Define Standard Logging button  to set up logging. If Specify Logging is selected, select the configuration button to set up logging. If Specify Logging is selected, select the configuration button  to specify logging settings. to specify logging settings. |
| 7. | Enter the required settings on the logging setup screen. |
| 8. | Select OK to save changes to the setup screen. |
| 9. | Select OK to save changes to the security window. |
To view the SmartConnect web service security log:
| 1. | Log into the SmartConnect client as an administrator. |
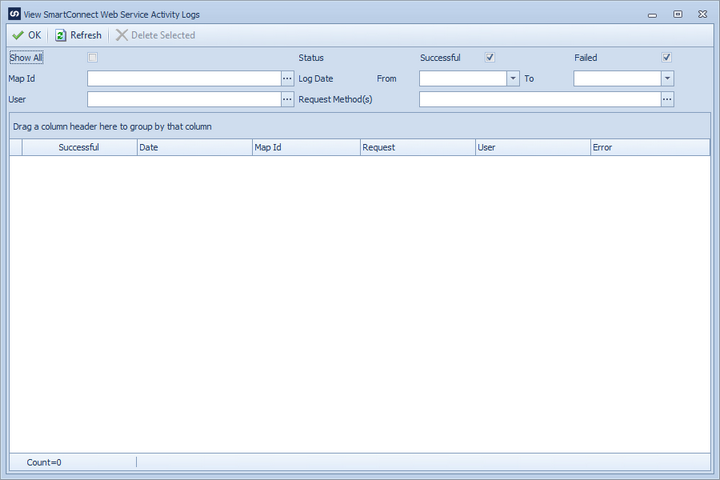
| 2. | Select the Activity Logs button from the Logs tab. |
| 3. | Enter selection criteria if required, then select the Refresh Query Button. |
To delete SmartConnect web service activity logs:
Manually
| 1. | Log into the SmartConnect client as an administrator. |
| 2. | Select the Activity Logs button from the Logs tab. |
| 3. | Select criteria if required then select the Refresh Query button. |
| 4. | Select the row(s) to be removed, then select the Delete Selected button. |
Automatically
| 1. | Log into the SmartConnect client as an administrator. |
| 2. | Select the Web Security button on the Setup tab. |
| 3. | Select the Logging tab. |
| 4. | Select the configuration button for either standard or specific logging settings. |
| 5. | Fill out the required details for clearance of activity logs. |
| 6. | Select OK to close the settings screen. |
| 7. | Select OK to close the security screen. |